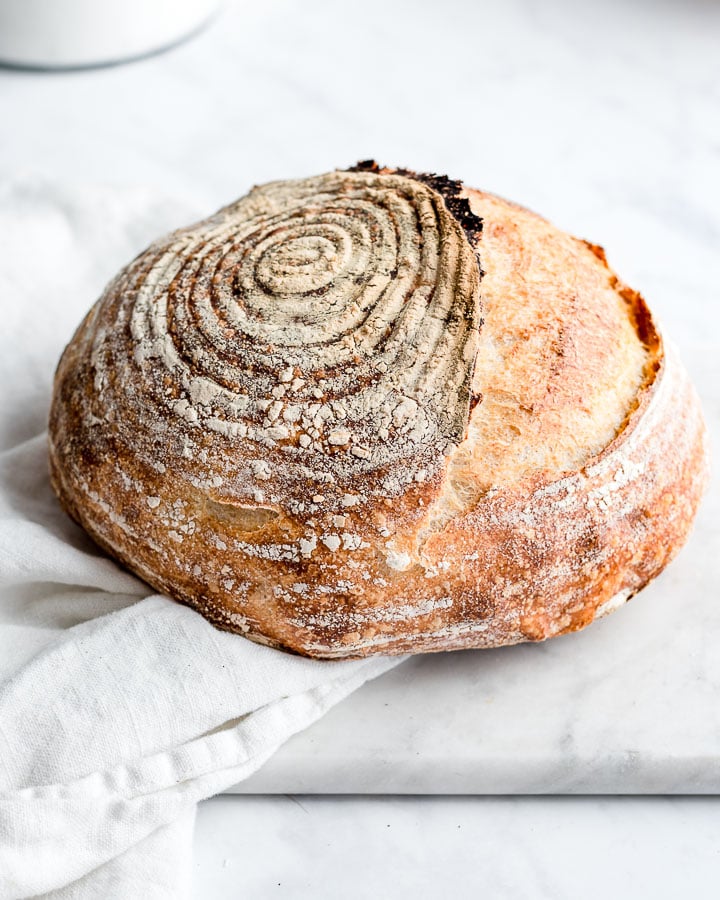
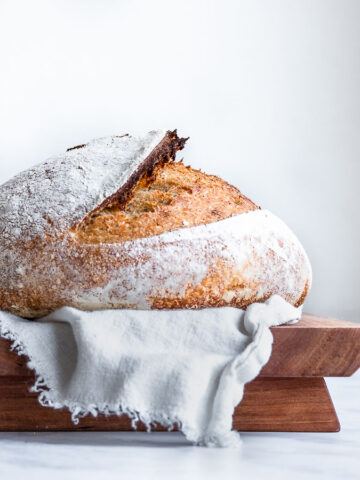
With a crisp, crackly crust and an airy, chewy crumb, this no-knead sourdough bread is a favorite in our household. We bake a few loaves each week because its simple, no-fuss process means just a little bit of effort yields marvelous results. Unlike sourdough bagels, which require extensive kneading, this bread is about as hands-off as you can get.
What is no-knead sourdough?
Sourdough bread is leavened with a sourdough starter rather than with commercial bakers yeast. And unlike bread with a tight crumb, which relies on kneading, no-knead bread has an airier quality, a more open crumb, and an artisan feel.
They also tend to take less effort than loaves of bread that you knead by hand. And you can make them easily overnight because they need less tending overall.
No-knead bread, and sourdough bread in particular, also have the benefit of being generally more nutritious and easier to digest. That's because the slow fermentation process releases enzymes that make minerals more bio-available (1) while also increasing beta-glucans in the bread, which is a long-chain carbohydrate that supports gut health and immune system function.
What do you need to make it?
At its simplest, a no-knead sourdough requires four ingredients: sourdough starter, water, flour, and sea salt. When you're so familiar with the recipe and process that it becomes second nature, you can start to adapt the recipe and begin to include other ingredients, too, like fresh or dried herbs and spices.
- Starter. Sourdough starter gives this bread flavor and makes it rise. Starters are described according to bakers percentages, that is how much water and flour used to make this. This recipe calls for a 100% hydration starter, meaning you use equal amounts of water and flour in your starter culture.
You can make your own starter from scratch easily in about a week. It is particularly helpful to use an heirloom starter if you're new to sourdough baking.
- Water. Filtered warm water works best for sourdough breads, because the chlorine in tap water can inhibit the microbes in the starter culture, slowing down the process. Warm water at about 100 F works particularly well, too.
- Flour. A mix of organic bread flour and whole-grain flour works well as a starting off point for beginning bakers. This combination gives the bread good flavor, while also being easier to work with than using 100% whole grain flours.
- Salt. Salt gives the bread flavor and improves its structure. Minimally processed fine sea salt gives the best results, because iodized sea salt can give bread a slight metallic flavor.
Helpful Tools
While making no-knead sourdough bread is fairly straight forward, you'll need a few kitchen tools to make this recipe. Some, like a Dutch oven and digital scale, are essential while others are less necessary but still helpful.
- Digital Scale. Baking requires precision, and while you can bake good bread using only volume measurements, a digital scale provides consistency and precision to your baking. That translates to better bread.
- Dutch oven. A cast iron or enameled cast iron Dutch oven helps capture steam, which gives your bread crisper crust.
- Banneton. A banneton, or proofing basket, gives your bread a place to rise so it doesn't lose its shape before baking. This is important for bread with high water content, like this no-knead sourdough recipe.
- Lame. A bread lame helps you score bread. If you're baking bread regularly, it's great to have on hand. But you can also use a sharp serrated knife or a razor blade, too.
- Dough whisk. This recipe makes a shaggy, wet dough and a dough whisk helps mix the water and flour together more efficiently than a spoon and with less mess than your hands.
- Glass mixing bowls with lids. You'll need a large bowl to mix the ingredients together and to let the dough rise, and you want to cover that bowl to keep the dough moist while it rises. You can use plastic wrap, but lidded glass bowls work best.
Tips for making no-knead sourdough
Before you bake, you'll want to pay attention to a few key points to make sure your bread comes out right every time.
- Weigh your ingredients carefully. While the recipe is wonderfully forgiving, weighing your ingredients with precision ensures consistently good results from loaf to loaf.
- Use warm water. Warm water (about 100 F) helps activate the starter and speed the process along.
- Refrigerate the dough while your oven heats up. Chilling the dough in the fridge after the second rise, but before you bake it, makes scoring it easier.
- Temperature affects rising times. Your dough will rise more rapidly in a warm kitchen and will rise more slowly in a cool one.
- Score the dough for even oven spring, and to prevent tearing.
Good companions for sourdough bread
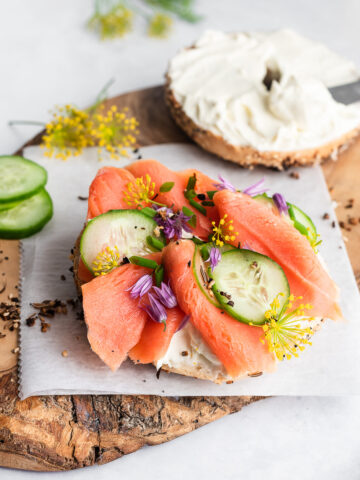
This no-knead sourdough bread is delicious with softened butter. But, it's also a great partner for savory spreads such as mushroom pâté, chicken liver pâté or even hummus.
A sweeter option includes roasted grapes touched with olive oil, sea salt, and rosemary.
Good bread is also the perfect companion for many soup recipes, especially root vegetable soup or asparagus soup.

Corrie says
Is there a certain bread flour you would recommend?
Jenny says
I use King Arthur Bread Flour and Bob’s Red Mill bread flour interchangeably.
Becky says
What size banneton do you use? I have one, but it's small.
Thanks.
Jenny says
Hi Becky,
I use an 8-inch.
Terry ann says
makes great bread I make 2 at a time and freeze one AWESOME!!
Elle says
Really impressed! Used your recipe for the starter and baked my first loaf today. Beautiful and oh so good! Everyone in my family loved it. Will be in my regular weekend rotation! Thank you so much!!!
Gaye says
Wow! This bread was really good! I made the sourdough starter from scratch and wasn’t sure if it was going to work. I followed the instructions exactly and when I poured the bread out of the basket after it raised, it flattened out a little bit so I wasn’t sure it would raise in the Dutch oven. I baked it according to the instructions and it turned out to be a beautiful, tall, sourdough loaf that tasted awesome, perfect!
Randy says
Fantastic! Success on first try!
My kitchen scale weighs in oz, so here's a conversion of the units
3.53 oz. sourdough starter (proofed and bubbly) (100 grams)
1 2/3 cups warm water (375 grams)
10.6 0z. bread flour (300 grams)
7.05 0z. whole wheat flour (200 grams)
2 tsp fine sea salt
My bread was a bit over-baked on the bottom crust, but probably just a function of inaccurate oven temps.
Emelia Myles says
First time making sourdough bread. Best bread I have ever made. Thanks for the guide! It worked out beautifully.
Elena Tsentas says
Hello, I have made this recipe a thousand times and it has come out well, so thank you. I split one dough into three equal parts (roughly 11 ounces each) and will bake each off separately in the cast iron. I am unsure about times. i was going to try 10 minutes lid on, 5 minutes lid off... roughly a third of the time since its a third of the dough... Have you ever tried this or can you recommend any times?
Joanne says
I make this recipe once a week - as pizza! The results are amazing and we love it for dinner 🙂 Thanks for sharing and thank you for the great website! PS I use spelt flour and it works great.
Kristen says
Hi jenny! Just started making sourdough bread and already am loving watching the bread rise higher every time and the holes get bigger...one question I have: the dough is very sticky which is fine until I get ready to shape it and then I have problems getting it into a ball...any tips?!
Karen Wood says
Good tips. I haven't tried any of the no knead breads yet. Your bread looks awesome. I am a seasoned baker of traditional breads doing it all by hand and it's always excellent but I just made my first sourdough starter from wild grape skin yeast this fall and just bought a dutch oven. I am going to try your recipe. I haven't been baking bread in a long time becasue I'm older and have joint problems and a small kitchen and it would be great if I can get good bread without the kneading. I love bread and haven't even been eating it because they ruined all the grocery store bread with their new strange ingredients.
Katie says
This is by the far the simplest recipe and BEST sourdough bread I've baked. Thank you for sharing!
I am still struggling with a bottom crust that is thick and hard. My top crust is light and crispy. Any thoughts on this? I use high extraction einkorn and then sub whole spelt in place of the whole grain einkorn. Otherwise, follow recipe exactly. Thank you!
David says
The bottom of the pan has to be scorchingly hot. Make sure that your dough is moist and cold enough. I add another 5% hydration. It seems to work best with my oven. Perhaps my temp control needs adjusting.
Laura says
Thank you for this wonderful bread recipe. My whole family enjoyed it.
Marla says
Hi Jenny,
Thank you for the many amazing recipes! I that you've got the ratio for all purpose einkorn. I'm wondering about using whole grain einkorn. I soak and grind jovial whole kernels, which is my main flour. I do have all-purpose, but really try to use mostly ww. Any thoughts? 🙂 TY!
Jenny McGruther says
Hi Maria!
I'd recommend that you start by substituting 1/3 the amount of WW einkorn then slowly work up to 100% WW einkorn until you find the right ratio. You may need to adjust liquid and rise times.