
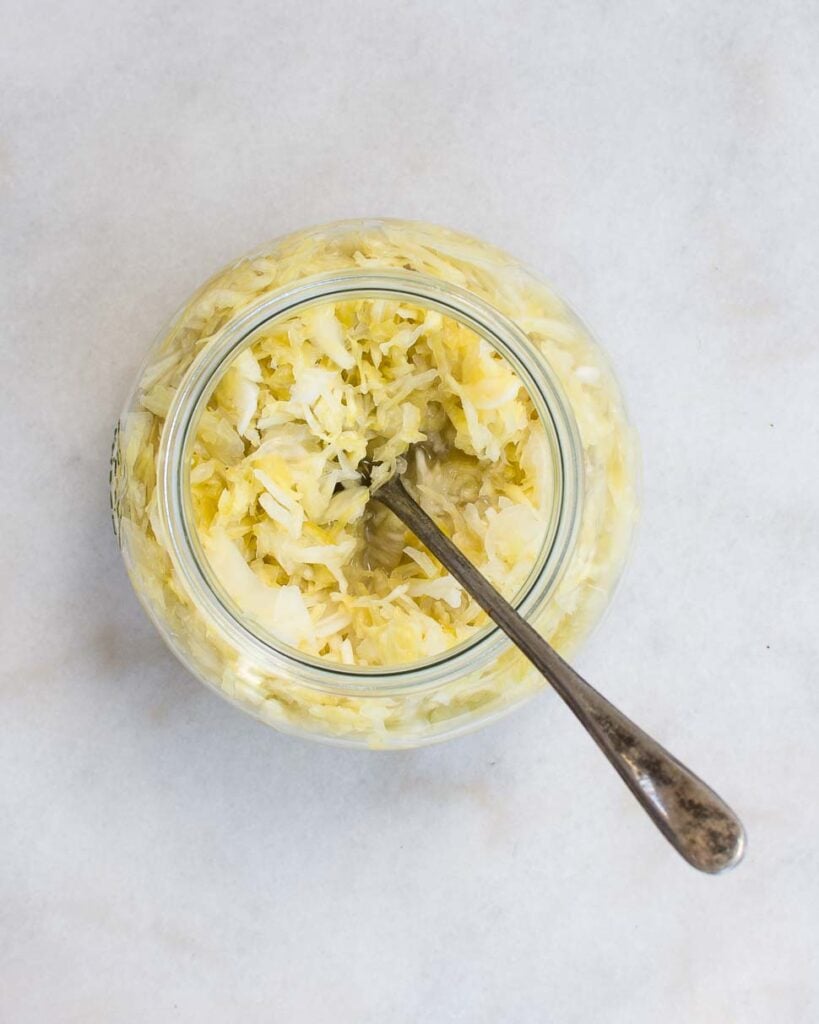
This sauerkraut recipe is easy to make at home and better than anything you kind buy in grocery stores. All you need is two simple ingredients: cabbage and salt. And then plenty of time to allow naturally occurring beneficial bacteria to ferment the cabbage. In a few weeks, you'll have your own batch of sauerkraut that's deliciously sour and salty and brimming with good-for-your-gut probiotics.
How to Make Sauerkraut
If you're learning how to make sauerkraut for the first time, rest assured it's very easy. As with most fermented vegetable recipes, there are only a few steps. Aside from a little slicing and mixing, the beneficial bacteria responsible for fermentation do most of the work for you.
- Prepare your cabbage by removing the outer leaves. Then core the cabbage, and slice it thinly.
- Mix the cabbage with a little salt and let it sit until the cabbage begins to release its juice. If you intend to flavor your sauerkraut, you can add herbs and spices when you add salt.
- Pack the cabbage in the jar or crock tightly. The juices should flow freely, with enough to submerge the cabbage.
- Seal the jar or crock. A weight is helpful for keeping the jar submerged, and using a fermentation crock or a mason jar equipped with an airlock is helpful for keeping the cabbage safely fermenting.
- Wait and let the good bacteria do their work. Lactobacillus and other strains of bacteria will eat up the sugars in the cabbage, producing beneficial acids that preserve the sauerkraut and make it taste sour.
Key Ingredients for Sauerkraut
At its simplest, you only need two ingredients for sauerkraut: salt and cabbage. You can also add various herbs and spices if you like.
- Raw cabbage is the foundation for sauerkraut. White cabbage is used in most traditional sauerkraut recipes, but you can also use red cabbage.
- Salt helps keep the cabbage crisp, gives the sauerkraut flavor, and creates an environment that supports the growth of lactobacillus bacteria. Minimally processed salt, such as rock salt or sea salt, is my favorite. Pickling salt, which is pure sodium chloride, is also a good option as it doesn't contain additives. Table salt works if that's all you have, but iodine may darken ferments, and anti-caking agents may affect the texture of your kraut.
Tips for Making Sauerkraut
While it's easy to make sauerkraut, there are a few things you should keep in mind to make sure that your kraut comes out perfectly every time.
- Use very fresh cabbage because it has a higher water content than older cabbage and will make a better brine.
- Shred the cabbage very thinly (about ⅛-inch thick works best). For the best texture, avoid food processors and cut your cabbage by hand or with a cabbage slicer.
- Keep the cabbage completely submerged in the salt water brine. The brine keeps your cabbage safe during fermentation and less prone to mold.
- If you don't have fermentation weights, wedge a cabbage leaf over the sauerkraut to prevent it from floating at the surface of the brine while it ferments.
- Keep it away from direct light and heat. A cool spot in your kitchen that doesn't get a lot of direct sunlight is perfect.
- Set your jar in a bowl or over a kitchen towel because sauerkraut juice may leak out of the jar, especially during the first few days of fermentation.
- Limit airflow. Your sauerkraut should ferment in an anaerobic environment that allows carbon dioxide to escape without letting oxygen in. An airlock or fermentation crock is useful.
- Taste it. After a few weeks of fermentation, your sauerkraut will be ready to try. Taste it periodically to see if it's sour enough for your liking.
- If it's too salty, soak it in cold water for 20 minutes to reduce the salt content.
- Watch for signs of contamination. Sliminess, a putrid smell, and visible mold on the cabbage itself are all signs that your sauerkraut has gone bad. It's best to discard it and start over.
Salt and Successful Fermentation
At its simplest, good sauerkraut needs only salt and cabbage. When it comes to fermentation, salt performs a few important functions.
First, salt helps to create an environment that favors lactobacillus bacteria. Those are the beneficial bacteria that make fermented vegetables both tasty and healthy. It also helps to keep other microbes like mold at bay until your fermentation is well underway. So we use salt for both safety and flavor.
Secondly, salt helps keep your ferments crisp. Without salt, your sauerkraut will become limp and mushy.
How much salt should you use?
Fermented vegetables like cabbage generally do well with 2-3% salt by weight. That means that for every pound of cabbage you use, you should also use 1 ½ to 2 teaspoons of salt.
You can also weigh your cabbage using a kitchen scale and then use 20 to 30 grams of salt for every kilogram of cabbage.
How to Store It
Fermentation preserves the cabbage and other vegetables naturally. That's because the lactobacillus bacteria that ferment foods release lactic acid, which, like vinegar, preserves foods, increases their shelf life, and keeps them safe for long-term storage.
If you're making a small amount of sauerkraut, tucking your jar into the fridge is usually sufficient. But if you're making more than a quart or two, you may need to find other ways to preserve it.
Once you've finished making sauerkraut, you can preserve it in a number of ways:
- Canning sauerkraut is a popular method, but it's unnecessary for long-term storage. The high heat required for canning destroys the beneficial bacteria and delicate food enzymes found in sauerkraut. If you're intent on canning, follow safe guidelines.
- Refrigeration is the easiest and most intuitive way to preserve fermented vegetables. Cold temperatures slow down the fermentation process. Make sure you store your kraut in its brine, and it will keep for at least 6 months.
- Root cellars are traditionally used to store ferments and cold-hardy crops. The low, even temperature functions similarly to refrigeration and slows down the fermentation process, allowing you to store them for at least 6 months.
- Freezing sauerkraut in food-safe containers is another option. Freezing temperatures may damage the probiotics over time and reduce their numbers.
How long should you let it ferment?
When you bake, there's a clear finish time. Accordingly, you pull them out of the oven when the timer sounds its alarm, or you risk burning them. But with fermented vegetables, there's much greater nuance.
First, you want to make sure that fermentation has started. So, you'll want to look for signs of microbial activity.
Bubbling and foaming usually begin within about three days, depending on the temperature of your kitchen. And once you see bubbles forming, you'll know that fermentation is underway.
But how do you know when it's done?
Fermentation is complete when your sauerkraut tastes pleasantly sour. It should have a sour aroma similar to vinegar but less pronounced.
So, if you've seen signs of active fermentation, like bubbles, and it smells pleasantly sour, it's safe to eat. You can continue to let it ferment so that it develops a rich, complex flavor and deep sourness. And transfer it to the fridge when it tastes right to you.
When considering fermentation time, keep the following in mind:
- Colder temperatures cause food to ferment more slowly, so your sauerkraut may take longer.
- Warmer temperatures cause food to ferment quickly, so it might need less time.
- Smaller volumes take less time than large volumes.
Use the Right Equipment
While you can make sauerkraut in regular canning jars, it's best to invest a little money into the right equipment. The right equipment can help keep your sauerkraut safely fermenting, minimizing the risk of contamination by mold and other microbes.
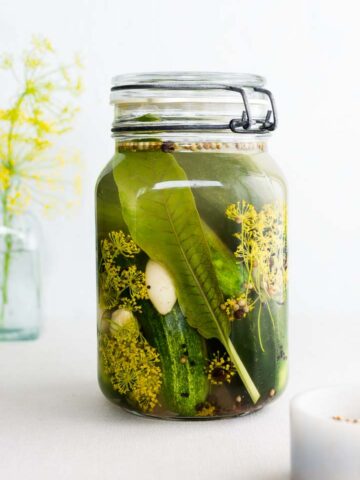
- Fido jars are glass jars with a rubber gasket and clamp top. When you use them with a glass weight, they work well for making sauerkraut and other fermented vegetables. A quart-size jar is a good place to start.
- Glass Jars with Weights and Fermentation Lids. These are inexpensive and perfect for small batches of a quart or less. Weights keep your sauerkraut submerged while fermentation seals keep oxygen out, and both help you to ferment safely.
- Stoneware crocks are heirloom-quality pieces. They come with heavy weights and have a well that you fill with water, which keeps oxygen out. They're excellent for large batch fermentation of 1 gallon or more.
Variations
Basic sauerkraut contains only cabbage and salt, but once you have the hang of making it, it's worth trying a few variations.
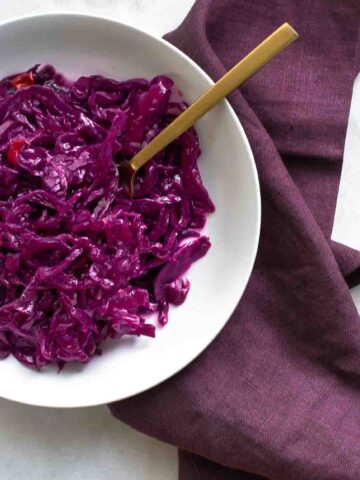
Use red cabbage instead of white. Red cabbage gives the kraut a deep purple color, and a mix of both red and white will produce a bright pink kraut.
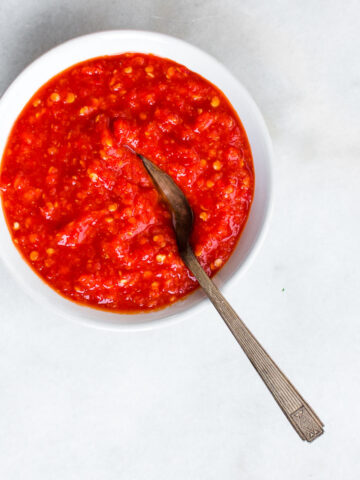
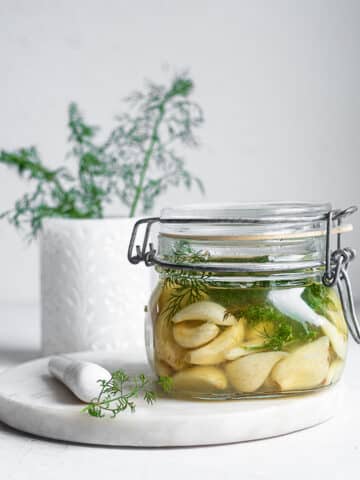
Add jalapenos and garlic, as in this spicy kraut. They have a lively flavor.
Caraway sauerkraut is one of our favorite versions, with its bright pop o flavor. It's delicious.
Juniper berries and sliced apples work well too, and it's a popular blend in central Europe.
Love this recipe? There's more.
Join Nourished Kitchen+ for ad-free browsing, nourishing monthly meal plans, live workshops, and access to all our premium downloads.


Maggie says
Hi Jenny,
I just made this and used a Fido jar with a glass weight. I am wondering if I need to burp it daily? I am guessing not, since you didn’t mention it.
Jenny says
Hi Maggie,
Yes, you will need to burp it. If you used a jar with an airlock, you would not need to burp it. But, because Fido jars do not have an airlock, you’ll need to burp it daily.
cedric says
thank you kindly
jenn says
I added garlic and dill to mine, because I like the one from Wild Brine.
Brushjl says
Straight out of the old country! Delicious. Mine never yielded much liquid, but it still seemed to work. I used it with Ukrainian pork, sauerkraut and dried fruit stew.
Michael R. says
I have made this recipe several times. It is wonderful This sauerkraut doesn't even compare to the store bought stuff. I'll never buy sauerkraut again!
I followed the recipe however I added a little 2% brine just to be certain that it was completely covered. 1 TBL salt to 2 cups of water is what I made. I added just enough to top off the jars.
Please keep adding delicious fermented recipes.
Jeanne says
This was awesome and super easy to follow. I added some garlic and dill to mine and it came out really good. I also used a mason jar and it seemed to work fine.
L. HULBERG says
I know this recipe well, as I used to help my father make sauerkraut. Though his was made in several gallons in a stoneware crock and took weeks to ferment. It was not only sour but there's also a sweetness to it that can't be found in store bought sauerkraut.
Desert Farms says
This looks so nourishing and satisfying!
Bryson Fico says
It’s crunchy and delightfully sour, perfect for topping a round of beer-braised brats or layering into a big sandwich. I think I made too much. Oh well, I will share it.
Kay M. says
I made mine, for the first time, using a 1 gallon jar. It took 3 heads of cabbage and lots of tamping. It had enough brine, but I would tamp it down once or twice per day. I didn't use any weight on it, just the tamping each day. I used a coffee filter and rubber band instead of cover. The coldest spot in my house is in the laundry room. After 3 days I tried it, and each day after, also. When it got to be 2 weeks, I knew it had to be the best, and it was.
During the fermentation process, if I saw a spot on the glass that looked like mold (blue/black color), I would wipe it away with a paper towel. Knowing I wanted to put it in smaller jars, after fermentation I wiped the inside of the jar out really well with paper towel, and filled smaller, clean jars with lids and put them in the fridge.
I found this kraut to be the tastiest, and crunchiest kraut I've ever had. I will definitely make this again!!!
Jeanne says
Thank you!
Angie says
So I tried this, but I added caraway seeds - and I think it turned out really good. I let it ferment 6 weeks though, not 30 days. Would garlic be okay to add, too?
Amber says
I really liked this recipe. I added some chopped garlic to it, and it was great.
Hannah says
Can I use a mason jar that has a hermetically sealed lid in order to acquire the anaerobic environment?
Mike says
Awesome easy and fun recipee!
How long can the fermentation be perpetuated; indefinately? Just add new ingredients?
Mine is working great; just wondering how long I can keep it going.
Thanks!
Mike
Steve Klebaur says
Thanks for a great article! I've found that the one time outlay of cash for a Harsch-type crock ( I have the Polish version, which works wonderfully) is well worth the cost for the time and labor it saves. Using one of these crocks with the water-lock moat at the top eliminates the need to open the crock at all, since it creates an anaerobic environment which doesn't support mold growth.
Laurie P says
I love making cultured veggies. Just so great to see you sharing this simple recipe with pictures as well as instructions. Just wondering about the glass jars with the air lock. Can't seem to find a link to where to purchase them. May you have a great day!