Unlike sourdough bread which is leavened with a sourdough starter, this wild yeast bread (or yeast water bread) is leavened with wild yeast captured by soaking dried fruit in water. As a result, you have a truly wild artisan-style bread, without the maintenance that sourdough requires.
While rise times are less predictable, the flavor of this style of bread is rich with just the tiniest essence of dried fruit, and without the distinct sourness of a true sourdough.
What is it?
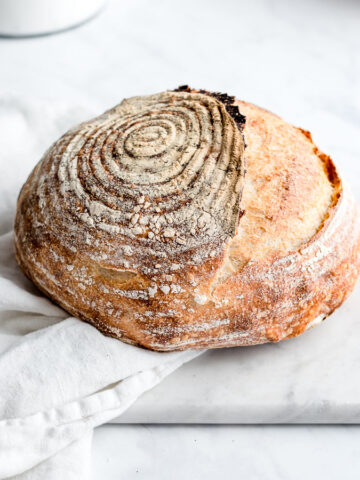
Wild yeast bread (also called yeast water bread), is artisan-style bread that you make with a wild yeast starter culture instead of commercial bakers yeast.
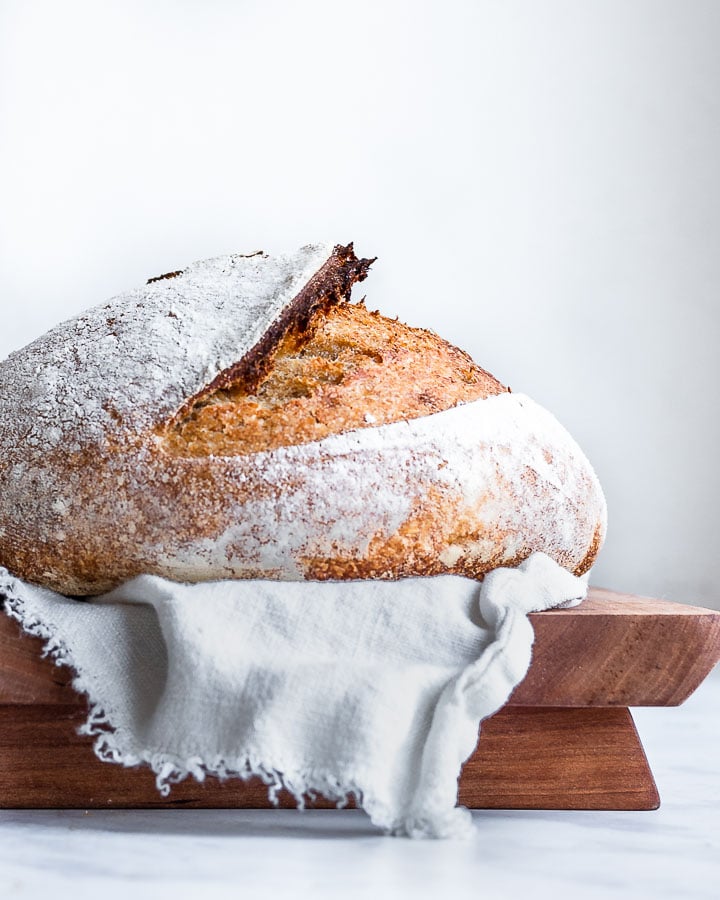
It tastes mildly sweet, with a hint of whatever you used to cultivate the yeast - often dried fruit or wild herbs. While it lacks sourdough's distinctive tang, this style of bread has its own charm: mild sweetness, crackly crust, soft and bouncy crumb.
How is it different from sourdough?
Wild yeast bread and sourdough bread are made in similar ways, and both are leavened without the aid of commercial bakers yeast. Their primary difference rests in the starter culture used to give both breads both their rise and their flavor.
Sourdough starter leavens sourdough bread. Bakers whisk together flour and water which encourages the proliferation of both wild yeast and lactobacillus bacteria. The yeast gives the bread its rise, while the bacteria give it a complex sour flavor and aroma.
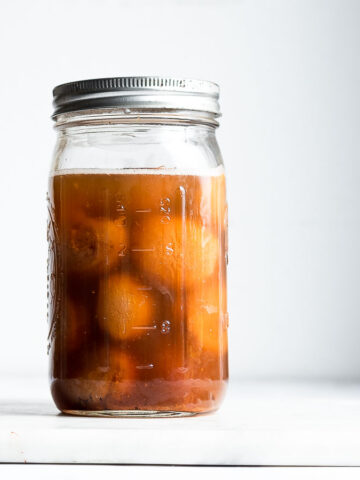
Wild yeast water leavens wild yeast bread. Bakers toss dried fruit (or other ingredients like fresh fruit and herbs) into a jar, cover it with water and let it rest until bubbly - about a week. Then, after straining, you use the yeast-rich water to provide both the liquid and the leavening for your bread. These types of bread will take a very subtle essence of flavor from whatever ingredients you used to capture your wild yeast.
A sourdough starter requires daily maintenance in the beginning, and periodic maintenance after it's well-established. With proper care, your starter will last indefinitely.
For yeast water, the starter requires no maintenance; however, it can be used only once.
Baking Tips
Working with wild yeast can be tricky. Because it's wild, it lacks the predictability of commercial bakers yeast which is bread for consistency in flavor and rise times. Your wild yeast will even vary in consistency from batch to batch, since each starter you make will have a different microbial composition and, quite possibly, cultivate different species or strains of yeast.
Here are a few tips to make sure your bread comes out well, each time you make it.
- Plan ahead. It takes about 5 days (possibly longer in cold weather), to capture enough wild yeast to leaven your bread.
- Use a kitchen scale. Using a kitchen scale ensures the accuracy of your measurements, making for better bread.
- If you have too much starter, only use the amount called for in the recipe.
- If you have too little starter, add water until you reach 300 grams.
- Practice patience. The timings in this recipe are loose guidelines, and your bread may take significantly more (or less) time to rise. Wild yeast can behave in unpredictable ways.
- Temperature also affects rise times. Bread will rise faster in a warm kitchen and more slowly in a cool one.
- Refrigerate your dough, it makes scoring your bread easier.
- Let your bread cool completely before you slice it, or its crumb may turn gummy.
Variations
Finely dice the fruit you used in your starter, and fold it in the bread.
Add chopped fresh rosemary and thyme to the bread for more flavor.
Fold shredded parmesan or pecorino cheese into the dough for a savory punch of flavor.
Lisa says
What type of water do you use? @tap, bottle etc.
Jenny says
Hi Lisa,
We use well water. By and large, the water source matters less than you think. Tap water is fine. Well water. Spring water. Bottled water is fine too, but I’d avoid it because it creates a lot of waste.
Lilian says
Hi Jenny,
May I know what's your room temperature while making/preparing the dough? For how long do you cold retard the dough before baking? Thanks
Jenny McGruther says
Room temperature in my house is typically 68F. 1) When the gentle pressure of a fingertip leaves a slight dent in the dough transfer it to the fridge. 2) Heat the oven. 3) When the oven is preheated, remove the dough. In effect, the dough is in the fridge for as long as it takes to heat the oven.
Brandi says
I noticed in the No-Knead Sourdough recipe when using Einkorn flour the amount of water was reduced. If I want to use Einkorn for the Wild Yeast Bread recipe, would I reduce the yeast water amount?
Thanks in advance!
Jenny says
Hi Brandi!
Yes, when converting wheat-based recipes to einkorn flour, a good rule is to start by cutting the liquid content of the recipe down by 20-30%.
Shakti says
Hello Jenny thank you for this fabulous recipe and for the wild yeast starter recipe - awesome.Do you have any suggestions for baking the bread if one doesn't have a dutch oven?
Thank you so much
Jenny says
Hi Shakti,
I'd strongly recommend picking up a Dutch oven because they're so versatile - for stewing, and stock making, for braising. And of course for baking crusty bread, too. If you don't have one, you could bake it on a baking stone. Or try to spray the oven with a little water before you bake.
Heather Huerta says
Can you use this wild yeast method with gluten free bread? If so, do you have any recipes?
Thanks!
Jenny says
Hi Heather,
You can try, but keep in mind that gluten-free flours may have different hydration requirements than wheat flour.
MELANIE HANSEN says
what size banneton and dutch oven do you use?
Jenny says
8-inch and 6-qt
Tracy McCallum says
Question - does it work with gluten free flours, do you know? I love the idea of using wild yeasts and appreciate your research and experience with all of this/
Jenny says
You could try with a gluten-free flour, but they require different hydration levels. Your best bet would be to find a gluten-free artisanal bread recipe, and then use the yeast water to replace the liquid and yeast in the recipe.