• Skip to primary navigation
  • Skip to main content
  • Skip to primary sidebar

Nourished Kitchen

  • Philosophy
  • Recipes
  • Cookbooks
  • Shop
menu icon
go to homepage
  • Start Here
  • Recipes
  • Cookbooks
  • Shop
  • Subscribe
    • Facebook
    • Instagram
    • Pinterest
  • subscribe
    search icon
    Homepage link
    • Start Here
    • Recipes
    • Cookbooks
    • Shop
    • Subscribe
    • Facebook
    • Instagram
    • Pinterest
  • ×

    » Home » Recipes » Grass-fed Beef Recipes » Making Fat: How to Render Lard

    Making Fat: How to Render Lard

    Posted: Jan 3, 2010 · Updated: Apr 22, 2022 by Jenny McGruther · This site earns income from ads, affiliate links, and sponsorships.

    Rendering lard is a lost art - a worthwhile technique forgotten in a fat-phobic, Lean Cuisine-centered culture.  Many cooks, seeking out local foods and forgotten traditions, have rediscovered how to render lard in their homes. Learning how to render lard needn't be a difficult task; it requires clean fat, clean water, a good stock pot and a quiet afternoon in the kitchen.  The reward of a beautiful, creamy white jar full of freshly rendered, pastured lard is worth the minimal effort.

    Pastured lard is a remarkably good source of vitamin D and of monounsaturated fat - the same fatty acid found in olive oil and avocado that is heralded for its benefits to cardiovascular health.  Odd that lard, given its fatty acid profile and vitamin content, earned such a bad rap over the last few decades.  Like many wholesome, nourishing fats, lard seems to have been swept aside for a time, but it's quickly earning a much-deserved renaissance - ensuring that taking the time to learn how to render lard is worth your effort both in terms of its redeeming nutritional value as well as in celebration of the wealth and variety of your local foodshed.  Hogs, and their nutrient-dense fat, are widely available.

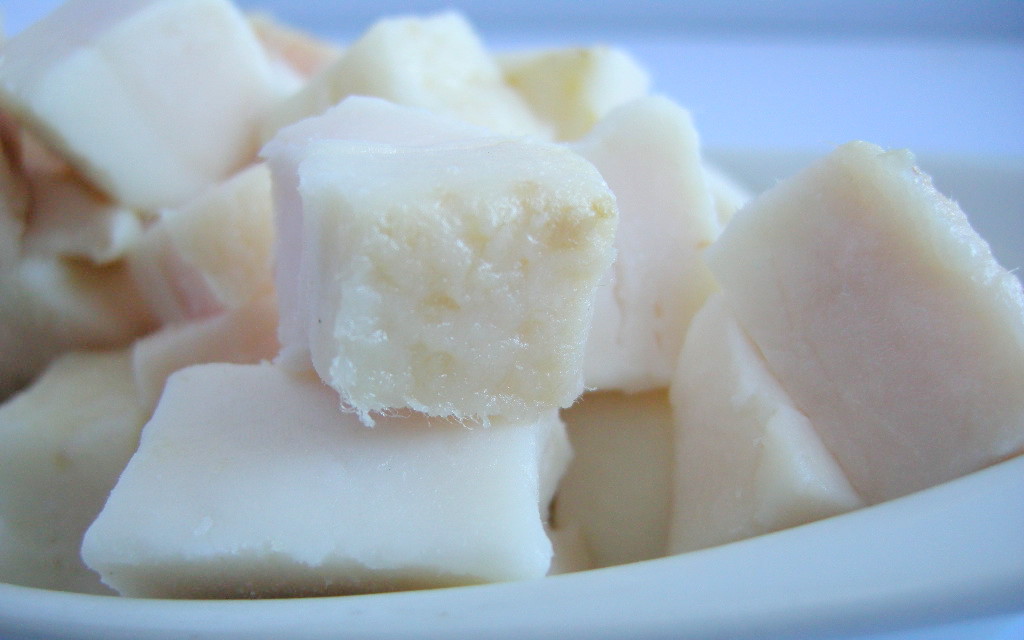
    how to render lard: cube lard first
    Rate this Recipe
    4.5 from 2 votes
    1 /2 - gallon

    How to Render Lard on the Stove top

    I prefer to render lard on the stove top, so if you're learning how to render lard from this method, take care to ensure you have a high-quality, heavy bottomed stock pot. Two and one-half pounds of fresh leaf lard or hog fat will produce approximately one-half gallon of creamy, nutrient-dense fat.
    Print Save RecipeSaved! Click to Remove Ads

    Ingredients

    • 2 ½ pounds lard
    • ½ cup water

    Instructions

    • With a sharp knife, trim any blood spots or remaining meat from the lard.
    • Chop the fat into ½-inch cubes.
    • Add the chopped fat and the filtered water to a heavy bottomed stock pot and simmer over medium-low heat, stirring occasionally.
    • After about 45 minutes to one hour, the water will evaporate, the fat will begin to melt and the cracklings - little bits of browned fat - will begin to float to the surface of the pot. Continue to gently stir the melted fat periodically, taking care not to let it splatter.
    • Eventually those cracklings will sink to the bottom of the stock pot, at that point you may remove your pot from the heat.
    • Line a fine mesh sieve with a 100% cotton cheesecloth and strain the melted fat, reserving the cracklings for another use (they're quite nice salted and eaten as a snack or served in place of breadcrumbs in a gratin).
    • Pour the melted fat into mason jars and allow to cool. The melted fat will be golden-brown in color, but, when cooled, will appear a creamy white.
    • Use your freshly rendered lard in pastries or as a fat for braising vegetables or seasoning meats.
    Rate this recipe!If you loved this recipe, give it a rating. Let us know what works, what didn't and whether you made any adjustments that can help other cooks.
    « Five Winter Greens You Don't Want to Miss
    Beef Pot Roast with Winter Root Vegetables »

    Reader Interactions

    Comments

    1. Emma Cook says

      November 04, 2021 at 4:00 pm

      5 stars
      Delicious AND nutritious!

      Reply
    2. Angie says

      November 23, 2020 at 12:26 pm

      4 stars
      It has been 2 hours and my cracklings have not gone to the bottom of the pot. I'm wondering how long to wait.

      Reply

    Leave a Reply Cancel reply

    Your email address will not be published. Required fields are marked *

    Recipe Rating


    Primary Sidebar

    Reader Favorites

    • Wild Mushroom Pâté
    • Rose Water
    • How to Make CBD Oil
    • Easy Sourdough Starter
    • Bone Broth
    • Easy Fermented Hot Sauce

    In Season Now

    • Brussels Sprout Slaw
    • Wild Mushroom Risotto
    • Einkorn Apple Cake
    • Pomegranate Spritzer

    Footer

    ↑ back to top

    Explore

    • Nourishing Recipes
    • Broth Recipes
    • Fermented Vegetables
    • Fermented Drinks
    • Cultured Dairy
    • Herbal Remedies
    • Sourdough

    Seasonal Cooking

    • Soup Recipes
    • Stew Recipes
    • Winter Vegetable Recipes
    • Winter Fruit Recipes

    Connect

    • About
    • Cooking Club
    • FAQ
    • Contact
    • Facebook
    • Pinterest
    • Instagram

    Privacy Policy + Disclaimer + Terms and Conditions + Affiliate Disclosure + Copyright Notice + Accessibility

    Copyright © 2023 Nourished Media LLC. All rights reserved.