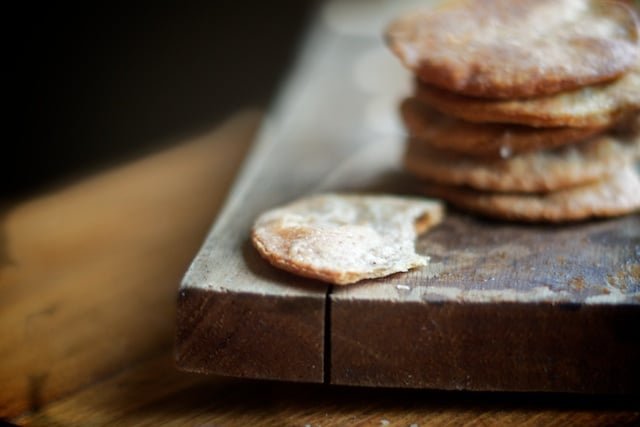
Homemade crackers are well-oved in our home – rustic, flavorful and tender, they’ve become a favorite of both visiting children and adults. While preparing homemade crackers doesn’t require too much time or kitchen know-how (even a novice can master the slow techniques of mixing, kneading and rolling), the results are simply lovely – a reminder of a time gone-by when everything served at the supper table was made with love, and always from scratch.
In our version of homemade crackers, we rely on whole grain flour for its rich and earthy flavor and nutritive value. First whole grain flour is combined with fresh yogurt, and allowed to rest overnight which fulfills the dual purpose of not only improve the tenderness of the grain, but also improving its nutrient profile. All whole grains contain antinutrients – naturally present substances like food phytates which keep the grain from sprouting until conditions for the plants growth are optimal, but also bind up with minerals in our digestive tracts, preventing their full absorption. Fortunately, the traditional methods of soaking, sprouting or souring grains prior to preparing breads, cakes, muffins and even homemade crackers not only improves the bioavailability of minerals, but also improves their digestibility and flavor.
In this recipe for homemade crackers, we use whole, full-fat yogurt to soak the flour before combining the dough with good quality grass-fed butter, which creates a flaky texture and crumb. Season the crackers with coarse sea salt, dried chives or dill, or leave them plain, anyway you make them is worth your time and effort.


Alisa says
Would this recipe work with whole grain wheat or all purpose white flour?
Jenny says
You could try and let us know how it works out.
Tiffany says
Can this dough be frozen?
Jenny says
I haven't tried that, but you could give it a go and let us know how it does.
Cameo says
This recipe seems quite adaptable. I use the King Arthur master weight chart (http://www.kingarthurflour.com/recipe/master-weight-chart.html) for a starting measurement for different flours and adjust accordingly for subsequent batches. In the future, I'll be trying out other fermented milk options and flour and seasoning combinations. I can hardly wait! Thanks for such a fabulous template, Ms. Jenny!
Shannon says
Can I use Fage Total Greek Yogurt? It is okay to leave this sit out for 24 hours? I am new to this so I apologize but how can this be okay to eat with yogurt sitting out all night 🙂
Sharon says
Oh my goodness! These are great! I had a cup of Einkorn flour that I had already ground, so I made 1/3 of the recipe with Einkorn and raw milk kefir, using only a wooden spoon to mix together. I left this for approximately 12 hours. I used a generous 1/3 of the amount of butter which I kneaded in with my hands. Since Einkorn can be sticky, I placed the mixture on parchment paper, put more paper on top of it, then flattened out first with my hands, then with a rolling pin. I cut with a pizza cutter, then placed each square onto a baking sheet. I flattened again any thicker ones, then brushed melted butter on. I baked on a stone sheet, so the crackers took 8-12 min. I got out a few crackers at a time depending on the brownness. After the crackers cooked, I sprinkled some with dried herbs.
For a sweet wafer, you could probably add honey or other sweetener to the mixture or sprinkle with cinnamon and sugar after baking.
These are delicious and easy! Thanks for another great recipe!
Robert says
Jenny,
You must have the patience of a saint. 😉
Eat Already! says
Baking tonight. Used sprouted spelt grain, milled at home to medium fine and home made goat milk yogurt.
They are looking good. I added turmeric and some seeds. Thanks!
nadine says
i like the dehydrator idea. mine were not as crispy as i had hoped, more like a flatbread if i left them in for 7 min, and burned if i left them for 8. still delicious. will try to dehydrate next. used raw yogurt made from our goats, and emmer flour ground up in the blender. will try with sprouted spelt flour next to see if i can get a nuttier flavor out of them, too.
Brittany says
Can I freeze the dough? If so, at what point can I freeze? (After I make it or after it sits out for a day)
How long do the crackers stay good?
Can I make break out of this dough or only crackers?
lynne says
I was wondering if anyone has tried it with the raw milk kefir, as queried above. If so, what amount did you use? I have an abundance of kefir that I'm look for ways to use! Also, if anyone used hard white wheat, which is what I have on hand. I just hate to waste ingredients if someone has already tried it and has some advice. Thanks
Cameo says
I just made two successful half batches using raw milk kefir/sprouted hard white wheat flour and raw milk kefir/rye flour. I did neglect to brush them with butter though.
Angelique says
Can I use milk kefir instead of yogurt?
Christiane says
I am eagerly anticipating your cook book. When is it coming out?
Jenny says
Hi Christiane!
I'm so glad you asked! It's out in March of 2013, and you can preorder it now: http://amzn.to/1bkbov7,
Hope you love it! There's so many recipes, so many photos.
Elise says
Do you think I could use rye flour instead of spelt? Or should I do a mixture of spelt and rye to get the right consistency? I've never worked with rye flour before, but it sounds like it might be good.
Lan says
I don't mean to make changes to your recipe but I don't have whole grain spelt flour, a stand mixer and I don't make yogurt ever. Can I use sprouted spelt flour, a food processor (or my hands??) and kefir cream or *thick* kefir in their places? Thank you! I'm really looking to make crackers at home for my daughter to eat with liver paté.
isabel says
Hi there, I tried making this and encountered a few problems. First, the dough was very stiff, it wouldn't become smooth, so I added more yogurt. Then after leaving overnight the surface seemed to have dried out. I kneaded the soft butter in, and incorporated it well, but the result was a very sticky dough. Do I add more flour or put it in the fridge to chill it? At this point it is impossible to roll out. Any advice would be appreciated, thanks!
Leah G says
Isabel, we make these all the time. The dough is pretty dry and stiff. I cover with a tea towel over night and yes the outside gets a lil drier still. The soft butter changes it all though. Once its incorporated in its perfect. I do have to sprinkle spelt flour over it as I roll it since I just have a wooden rolling pin. The warmer it gets the stickier. Also I now just roll on parchment and cut with a pizza cutter before baking. I also tend to finish them in the dehydrator for about 20 min after baking.
Mary Ruth says
Can't wait to try these! I have been wanting to try crackers in my oven for a while. I am grateful for the comments left so that I can understand more of the process. I tend to make something for the first time with the exact instructions and ingredients, then make changes to my diet/preference later on. Thank you for posting this recipe, I gladly open my subscription on Facebook and ALWAYS find something informative and useful to try! Love this site!
Leah G says
Just finished baking last batch....very easy and nice. The 20mo helped mix all along. The kids LOVE them. I just rolled out on parchment and used a spice bottle cap to cut the perfect cracker size. Thanks Jenny!
Julie says
I just made a batch of these today, using kefir in place of the yogurt and 1/2 the suggested butter. They turned out really nice. We eat so much butter already, that I couldn't get myself to use 2 full cubes. I could only fit half the dough on my stoneware pizza pan, so the other half is yet to be baked. Baking time was 10 minutes before the outer crackers began to brown. I put the inner crackers into the toaster oven for a cycle and they crisped right up. Thank you for posting this recipe. This is the first time i have done a soaked grain recipe. I have sprouted my own wheat and ground it for bread and muffins. The naysayers of sprouted grains may say that there isn't much of a difference btwn sprouted and not, but my body tells me otherwise! I am interested to see what it says about soaked 😉
Maureen says
I'm interested in making this recipe but the only problem is that I have a really bad dairy allergy. I was wondering if you think it might work with plain soy yogurt and the butter with Earth Balance?
Denise says
Have you tried this with einkorn flour? I would like to make these.
Denise says
Would these work with einkorn flour? It is a little different.
Sebastian says
Jenny, will there reduced break down of the phytic acid/ antinutrients/gluten due to the use of yoghurt (calsium) in this recipe?
-G.M
Lisa says
Would these work in the dehydrator?
Liz Rollings says
Could i use something non dairy in place of the yogurt and butter? They sound fab but i'm trying not to eat yogurt. Thanks
Debmom4ca says
There are non-dairy yogurts available. My favorite is almond. I am going to make this with goat yogurt as I can't tolerate cow milk.
Lynne says
Jenny, I'm confused. In the recipe, you said use softened butter and now you are saying use chilled butter. Please explain further. Thanks
Randa says
Hmm... I'm not seeing a reference to chilled butter - where are you seeing that? I used softened butter to mix into the dough (after the dough had sat w/ yogurt mixed in for 24 hours), and then I brushed a little melted butter over the top of the rolled-out dough. Tasted great.
I probably didn't roll mine thin enough, because they weren't crispy after 15 minutes in the oven, so I put them in the dehydrator for a few hours. Had a nice crunch after that.
Pat says
In the reply you sent for us to not use the mixer, get slathered to the elbows with the chilled butter. Sorry, no can do. The whole reason I have that KitchenAid is my RA.
Jenny says
Sounds like this isn't the recipe for you.
Alexis says
Are they supposed to be more flakey or crunchy? Maybe I didn't roll mine thin enough. I found that if I rolled them out on parchment paper it was a lot easier to just move the paper to the cookie sheet then each cracker.
alexis says
Figured it out! I just spread the.second batch with my hands so I could feel the thickness. They are a huge it in this.house!
Erin H. says
For the love of pete... how does one knead 1/2 c. softened butter into the thick dough-ball? Short of being slathered in butter up to my elbows, my dough hook/bowl are merely spinning the dough with the extra lubrication. Tips? Thank you!
jenny says
Get slathered up to your elbows in butter. 😉 Don't use a machine for this; rather, physically knead the chilled butter into the dough.
Jules says
I tried these last night and they were very tasty. Instead of kneading the dough, I laminated it. I rolled out the dough slathered it with the soft butter then folded and repeated the process until it was well incorporated into the dough. Laminating takes a bit more time but the results were excellent. However, I did find that in order to crisp these crackers up I had to let them sit longer in the oven (more than the 6-7 minutes). After cooking them at the temperature recommended here, I turned the oven off and cracked the door slightly to allow the crackers to sit and dry out a bit more - I had to keep an eye on them to make sure they did not burn or brown too much. In the end they were very close to the consistency of a Dr Kracker - but richer because of the butter and yogurt. I will continue to play with my food here, working from this great base recipe. Thanks..
Lauren says
I just made these with buckwheat and lard (more than you've listed, as my yogurt is so stiff) and they came out well. Except for the batch that I turned my back on - those are little briquettes. Did yours sort of fry on the baking stone, or is that a function of the added oils in mine?
Cathy says
Thanks for the lovely recipe. I can't wait to try them. What's the best way to store them and what is their shelf life?