
While store-bought yogurt is convenient, it just can't compare to what you can make at home. Homemade yogurt can range from mild and creamy to mouth-puckeringly tart, depending on your preference. It's also super easy to make, and you can save a ton compared to the storebought version.
What is it?
Yogurt is a cultured dairy food made by fermenting milk until sour and thickened. You'll find versions of yogurt in almost every dairying society across the world. Some culinary traditions use cow's milk. Others use sheep, goat, or even mare's milk.
Yogurt relies on a starter culture that is rich in beneficial bacteria such as Lactobacillus bulgaricus and Streptococcus thermophilus. These bacteria inoculate the milk and then metabolize the milk's naturally occurring sugar: lactose. As the bacteria proliferate, the milk thickens and turns tart. And in a matter of a few hours, you'll have homemade yogurt.
What you need
Yogurt is simple to make and contains only two ingredients: milk and a starter culture. You'll also need a few pieces of equipment such as a saucepan, thermometer, yogurt maker, strainer or cheesecloth, and a whisk.
- Milk. Milk can be skim, 2%, or whole milk. You can use any traditional dairy milk, including cow, goat, or sheep. You can also turn raw, pasteurized, or UHT milk into yogurt; however, because milk is scalded first, this recipe does not make raw yogurt. I recommend using whole, grass-fed cow's milk for best results.
- Starter culture. Your starter culture can be any plain, additive-free yogurt that you like the flavor and texture of, including store-bought yogurt. However, I recommend picking up an heirloom yogurt starter for the best flavor.
- Yogurt maker. Keeping a steady, even texture is essential to making good yogurt, which is what yogurt makers are designed to do. While not strictly necessary, they are extremely helpful - especially for newcomers.
- Strainer. Straining yogurt gives it a thick, luscious texture. You can strain it through a square of folded cheesecloth or use a reusable yogurt strainer equipped with a very fine screen.
A few tips for making yogurt
While yogurt is simple to make at home, needing only a few steps, there are a few tips to keep in mind to make sure it consistently turns out. And, if you're having trouble with your homemade yogurt, check out this troubleshooting guide which can help you identify why it's not turning out quite as you expect.
- Scald the milk first. Even pasteurized milk can contain stray bacteria either from the facility in which it's packed or after sitting open in your fridge. Scalding the milk (whether raw or pasteurized) kills off those bacteria, allowing you to inoculate it with desired bacterial strains that make delicious-tasting yogurt.
- Cool the milk quickly. Cooling the milk quickly returns it to a temperature that's ideal for bacteria in your starter culture - about 110 F, and helps give it an ideal flavor and texture.
- Pay attention to temperature. Bacteria are sensitive to temperature. Too high a temperature will kill them while too low a temperature will stall their work - resulting in yogurt that never turns out. The ideal temperature for culturing yogurt is about 110 F or 43 C. A range of 108 F to 112 F is what you should shoot for.
- Strain the yogurt. Straining removes some of the whey (or the liquid portion of your yogurt), resulting in a super creamy texture. An hour is usually sufficient for most homemade yogurt, but overnight works well for Greek-style yogurt.
- Whip the yogurt. After straining, whip it with a balloon whisk until lightened and voluminous. This extra step introduces air into your homemade yogurt for an unbeatable light texture.
Variations
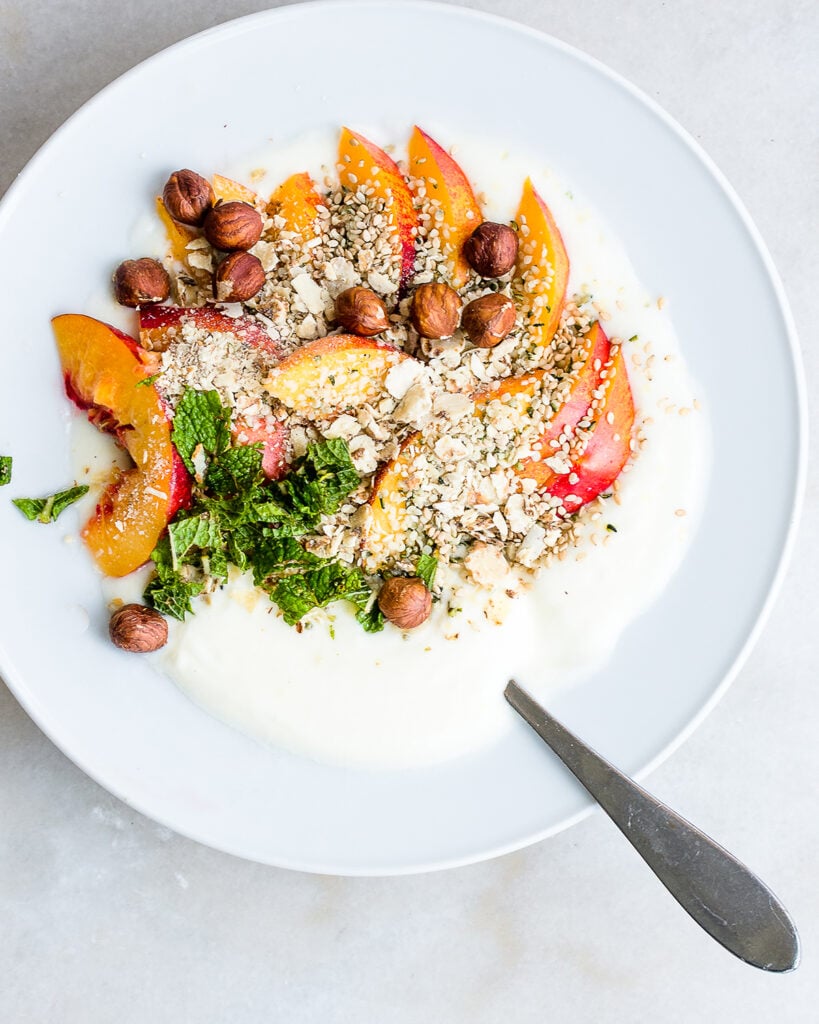
Fruit-flavored yogurt. To make fruit-flavored yogurt, you'll culture your homemade yogurt as called for in the recipe above. Then spoon jam or a fruit coulis into the bottom of a jar, top with homemade yogurt, and seal the jar. Stir before serving.
Greek-style Yogurt. To make Greek-style yogurt, strain homemade yogurt for about 8 hours and up to overnight. The longer it strains, the thicker it will be.
French-style Yogurt. French-style yogurt is made from whole milk and is not strained. To make it, follow the instructions above using whole milk and omitting the straining step.
Recipes Questions
The USDA recommends storing yogurt in the fridge and consuming it within 2 weeks of making it.
You can freeze yogurt for up to 2 months; however, freezing may impair or damage some of yogurt's beneficial bacteria.
Yogurt that has gone bad may smell putrid or rotten rather than pleasantly sour. You may also see signs of mold contamination, such as spots of green pink, or white.
Tilt the jar slightly to one side. If the yogurt separates cleanly from the wall of the jar, you know it's ready. This culturing process typically takes 6 to 8 hours at an elevated temperature of about 110 F.
Yogurt ferments for about 6 hours; however you can ferment it longer if you prefer a sourer flavor. If you ferment yogurt too long, the yogurt will turn very sour and may separate.
When you strain yogurt, you'll remove the liquid portion of the yogurt which is called whey. You can discard it. I'll often add it to smoothies such as this Greek Yogurt Smoothie in place of actual yogurt. or use it to kickstart fermentation in whey-based fermented drinks such as this fermented lemonade.
Yogurt makers keep a steady, even temperature - exactly what you need to successfully culture yogurt; however, you can make yogurt in any device that can keep a steady temperature of about 110 F such as a sous vide immersion circulator, dehydrator, or even an oven with the pilot light on.
Scalding the milk (bringing it up to 180 F) kills any bacteria that may have contaminated the milk, ensuring that you're starting off with a clean slate of only the bacteria in your starter culture. As a result, your yogurt will be consistent in flavor and texture from batch to batch.


Alayney says
I was MEANT to see this TODAY. I was at the grocery store (today) and told myself I'm NOT buying yogurt because I'm going to make my own! Thank you for the reminder!
Virginia says
I make mine with powdered nonfat milk. It makes the most delicate curd that melts on your tongue.
Sharon Murphy says
I put my yoghurt in the small jars that came with my yoghurt maker. When I strained the next morning, I ended up with barely any yoghurt left. Should I strain before putting in the jars? Does not seem right to strain each little jar before eating but not enjoying it so runny.
joelle e poirier says
I put mine in a cooler ,no water, a nicely folded small wool blanket on top, it turns out perfect nearly every time . One and a half gallons of milk, we are farmers . When eating out morning hot cereal we add a little real syrup frost it thickly with yogurt and add frozen raspberries from the patch. We are blessed
Matt says
We either stick it in the oven overnight with the light on or in a cooler with hot tap water. For a starter, my wife buys the single serving Greek yogurt, and I mix in a spoonful at a time. We then use the tail end of that batch to start the next batch. We'll make 4-5 generations of add'l yogurt from that original batch before the cultures start to lose their effectiveness. We make a gallon at a time, eating it over the next 4 weeks (despite what the USDA says - I've never had it go bad). For add'l flavor, we make homemade strawberry or peach jam and mix it in. So for the price of a gallon of milk ($3.50?), you get a gallon of yogurt that sells for $5-$7/quart around here.
Andrea Scott says
I make my yogurt in quart jars placed in a hot water bath in a cooler. It works every time!
Kerry Hewson says
I make yogurt in my oven! I place a glass bowl of milk/starter covered with a flour sac towel into my oven ( I "warm" my oven using just the light) which keeps the temperature at a steady 110 degrees) . Put it in at night, and it is ready to strain (for greek yogurt) in the morning. No-muss, no-fuss. Love making keifer too- by far, is the easiest culture.
Noelle says
I love how easy it is to make yogurt at home. And it's much more affordable to make yogurt from organic milk than to buy organic yogurt.